
Whew! We made some huge progress this week! Clock hours spent this week: 39. Much of that was Jim and I together, and the kids helped a bunch on Saturday. Most of the rooms just need carpet to be 100% done. YAY!
We keep hearing “why are you spending so much time on that house?” After all, to date we’ve spent 150 clock hours….with two people most of that time that makes 300 man hours!
- If we didn’t tackle a kitchen remodel, we would have been done a LONG time ago. That has been the biggest time eater (and expense, besides carpet).
- If we didn’t have to repaint every room- we would have been done a LONG time ago. (most rooms didn’t have any leftover paint to do touch-ups with, or what we thought was the right paint was the wrong sheen (too flat or too glossy) so we had to buy all new paint. To make it easier for FUTURE touch-ups and repainting, we bought a 5-gallon bucket of ONE color to do the WHOLE house. Thinking ahead!)
- Outlet and switch replacement. No GFI’s were in the bathrooms/kitchen. After encountering a couple outlets that broke as Jim inspected them, he decided to go through and check/replace every outlet in the house.
- Drywall damage in the master bedroom from some plumbing repair to the master shower. We needed to hire that out since it was above my technicality- which adds time.
- Unfinished projects left over from the owners. Some rooms didn’t have trim up. Some rooms had trim up but had notches cut out to fit TV mounts or cable runs. And what had been installed a couple years ago – had never been painted and had taken some abuse- so every piece needed to be scrubbed (and some minor repairs needed) before we could paint. And when we painted, we put three coats on. Eight doors needed painting, too.
- Laminate flooring was installed several years ago, but not finished- some sections still had installation spacers in place, there is no caulking or trim at the garage door or sliding door jambs, no caulking around the kitchen “wet areas”, trim around the kitchen cabinets, etc. and some of it was installed with too large of a gap which has created trim issues.
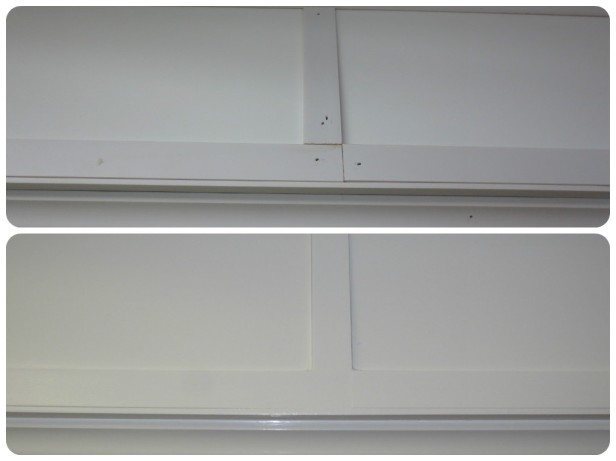
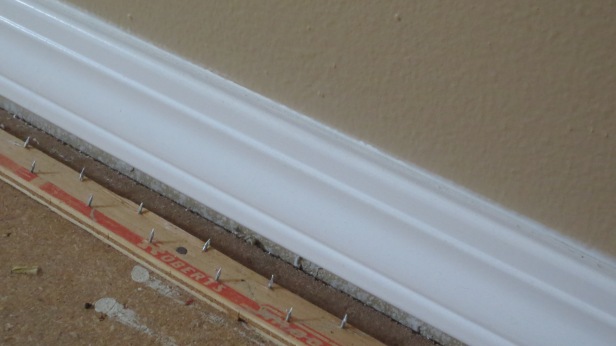
- Several windows had peeling caulk, or were caulked with non-paintable caulk which has been a mess in itself that we are STILL dealing with and I think we might just give up. This picture is after SIX coats of paint- it simply does not stick! The BIN primer covered it until we taped the wall to paint the trim, and the tape pulled the paint and BIN right off! Note to everyone: never ever ever, never never never ever use non-paintable caulk around ANYTHING that might EVER EVER need to be painted. Never.
Anyway, we knew there was a lot of finishing work needed going into this (which is why the owners didn’t list with a realtor, because the realtors said they needed to finish that stuff in order to list it, and they simply didn’t have the time!).
BUT HOPEFULLY, in the future, now that all of this has been DONE…..as renters move out all we need to do is minor patching and touch up painting! We’re keeping our fingers crossed on that!

Back to the progress report:
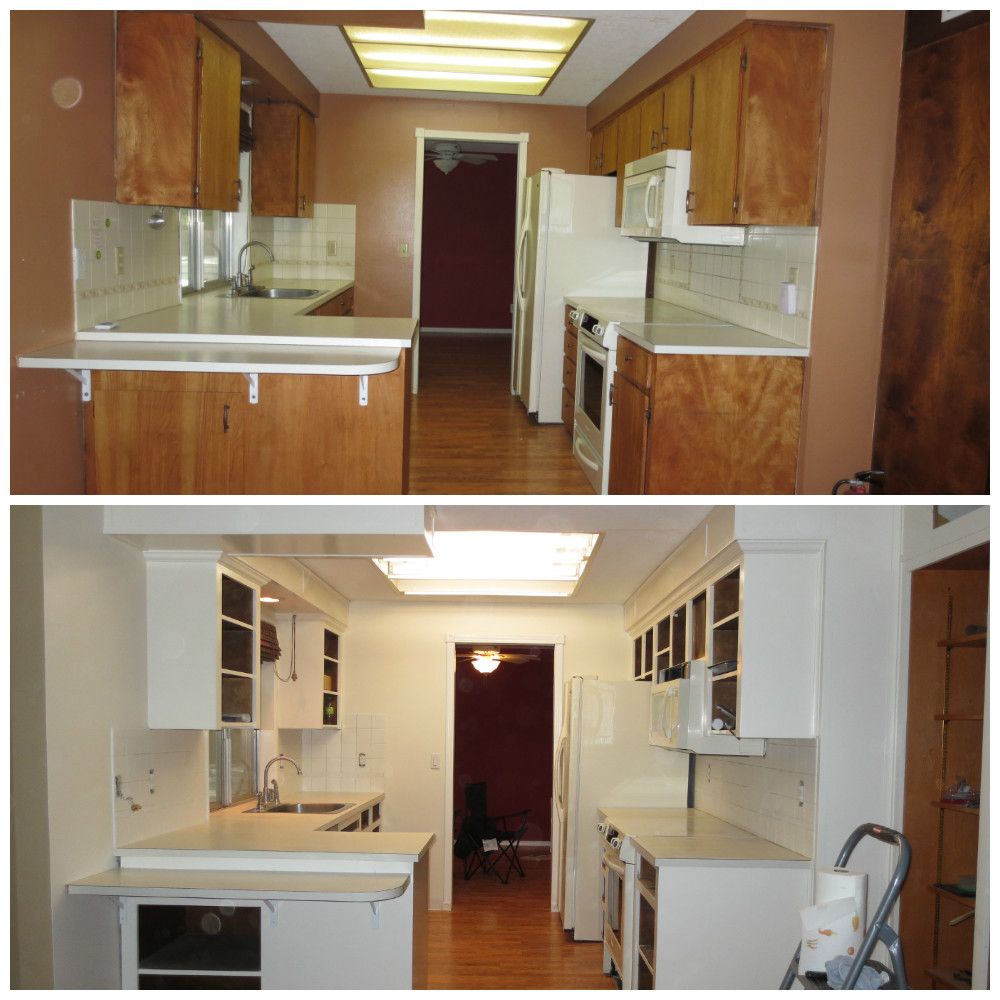
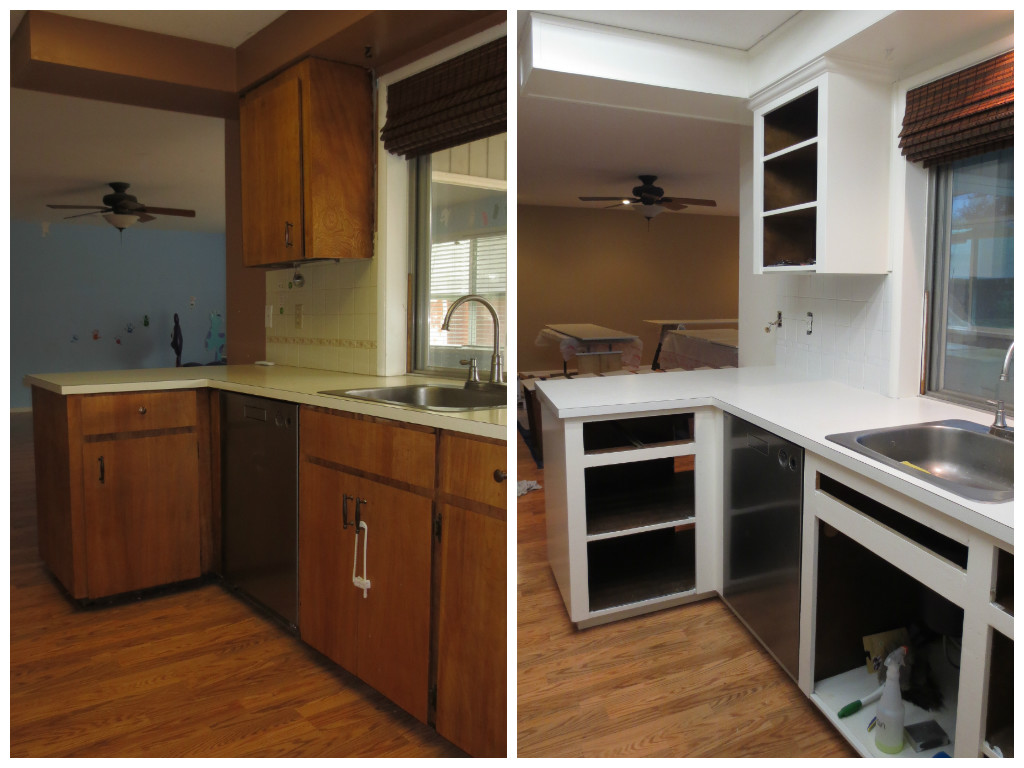
KITCHEN: If you remember, last weekend I gave myself a new project for the week- the kitchen soffit makeover (see this post). This week was spent spackling and sanding and caulking and painting- and painting- and painting- and it’s DONE and it matches the cabinets perfectly and I’m so so so happy with how it turned out!

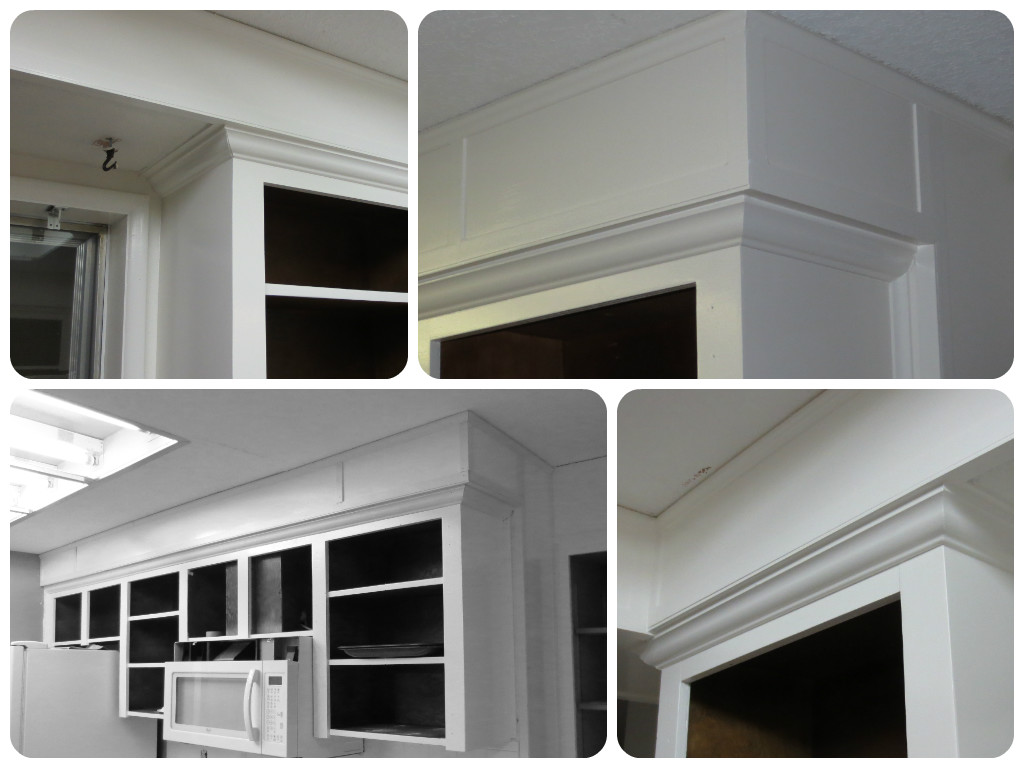
The walls got three coats of the same “polar white” cream color as the cabinets. Yes, it makes for a very white kitchen, but stay tuned, there’s some dramatic stuff coming soon.
As mentioned above, there wasn’t any trim under the kitchen cabinets, so I found some unpainted trim in the garage, cut it to size, painted it during the week (the same cream color as the cabinets) and installed those pieces Friday night.
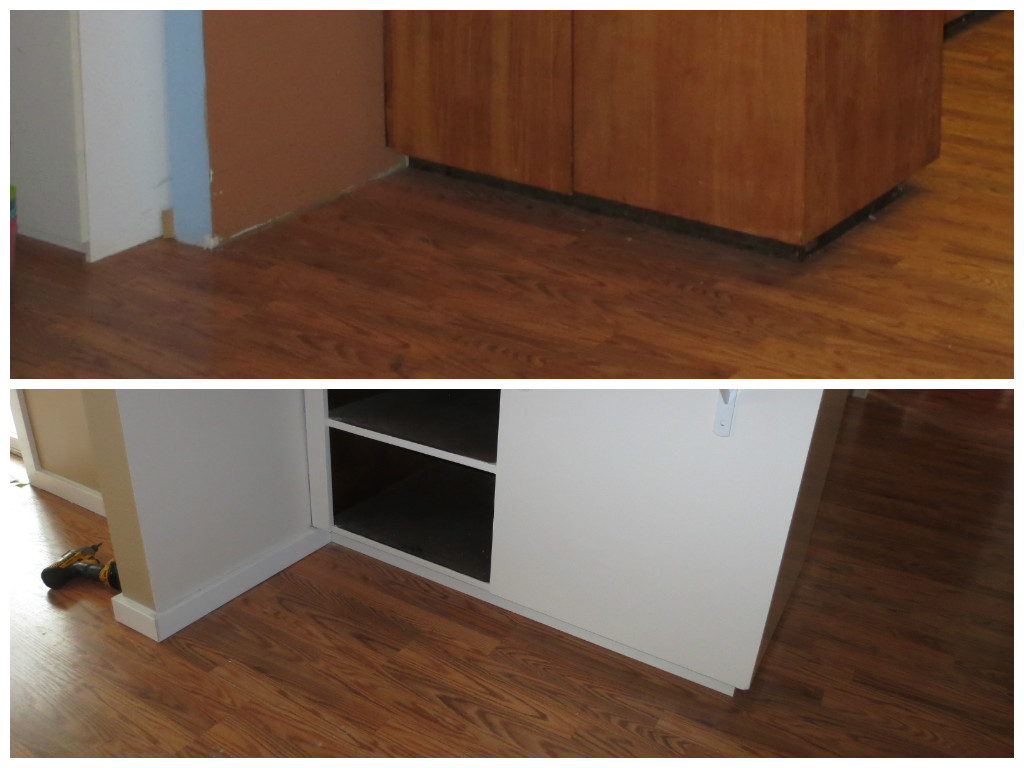
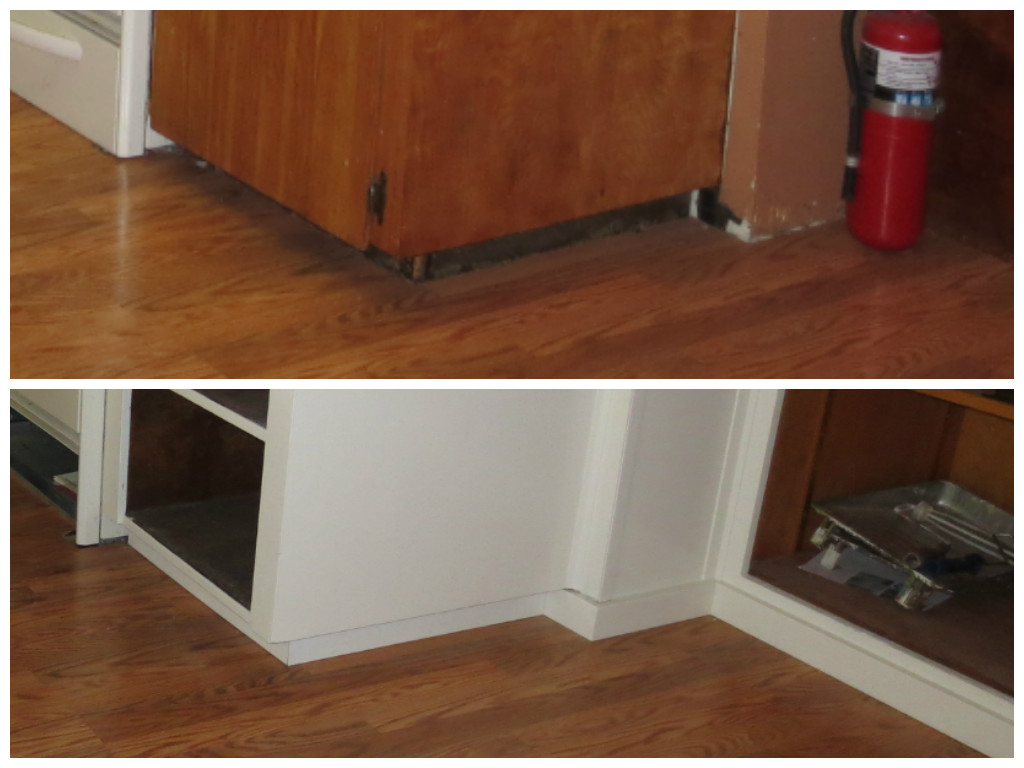
I also caulked around the flooring where there’s risk of water damage- like around the fridge, below the sink area, right next to the stove. (Pergo/Laminate in kitchens or bathrooms requires a caulked edge to protect the floors from water damage- otherwise water spills down to the exposed ends and gets under the flooring and causes warping). So now the floor is sealed, the trim pieces are up- I even put trim behind the fridge!

SO- the cabinet boxes are DONE, the soffits are DONE, the painting is DONE, the trim pieces are all in place and DONE…… the cabinet doors & drawers just need a final coat of paint (maybe 2 final coats?)….then I can reinstall the hardware and hang them next week and they’ll be DONE!
Here’s the latest and greatest reveal:
Oh, and we had someone come over to bid recovering the countertops with newer formica, and decided we’d just stick with our original plan of using the Rustoleum Countertop Transformations:

Prep work was started on Sunday. Sanding the existing formica so it is fully scuffed:

Hopefully we will apply the base coat and chips Monday evening, with sanding on Tuesday and sealing/topcoat on Wednesday. It needs 48 hours to cure before touching- and a full week before resuming full-use. Cross your fingers!
JIM’S JOBS: Jim spent the week finishing all the painting projects in every room- painting the window sills, painting the door and floor trim, any minor touch ups or cutting-in issues. He also swapped out all the outlets and switches with new outlets and switches and while he did that he labeled the electrical panel. Everything is fresh and new- electrical wise. Saturday night we set up a painting booth in the garage so we could spray the doors out there- Sunday he painted the doors with their first coat. A second coat will be done sometime this week. Doors will go back up after the carpet is installed (scheduled for Thursday 10/10).
KIDS JOBS: The kids were a huge help on Saturday. We haven’t been having them do too much at the house because most of the jobs are above their level of abilities, but we had quite a list for them for the weekend: replacing all the outlet/switch covers, cleaning behind the fridge- under the fridge- and the fridge sides, Trevor helped paint the kitchen, Brooke painted the shelves in the big bedroom closet, all three kids took turns scrubbing the master shower (soap scum build-up), and they swept and mopped and scrubbed any tiny paint drips that fell on the floor. OH, and cleaned both bathrooms- toilets, counters, sinks, floors, etc.
BEDROOMS: The chair rail has been installed and the closet organizers reinstalled and the closet curtain rods rehung. The outlet covers are back on and we are ready for carpet! DONE!

MASTER BEDROOM: Baltazar made his drywall repairs last weekend and my mom and Jim painted the room this week. All that’s left is trimming the closet, sliding door and floors.

MASTER BATHROOM: Done! The floor trim was installed over the weekend, the cabinets were freshened with a new coat of paint, hardware changed to oil-rubbed bronze. Check it out!

MAIN BATHROOM: The main bathroom backsplash is complete! Yay!

I’m working on trying to refresh the cabinet doors/drawers to a more lustrous appearance….here’s the first improvement after a good scrubbing and using “Trade Secrets- Scratch Remover for Dark Wood”:

I think I’ll need to do a couple more treatments to get the full finish back.
GENERAL: I caulked all the trim edges throughout the house- I just think it makes a much nicer seam and finished look. I didn’t use my tape trick, I just used a wet finger to smooth it out.
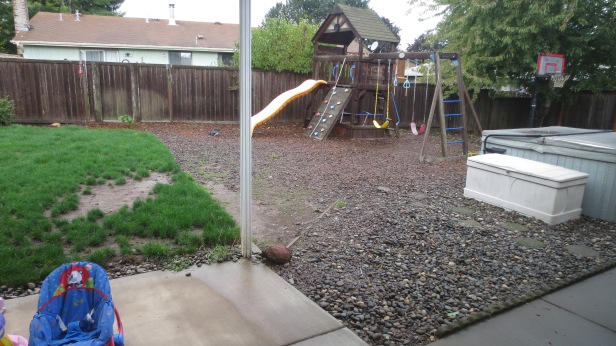
OUTSIDE: There’s some cleanup that needs to be done, but with our current weather we’re thinking we’re just going to have to do the bare minimum and give the renters an apology! There’s lots of bare mud/dirt… and rocks in the cedar chips, and cedar chips in the rocks, etc.
But there you have it! Our progress and a little backstory on why we are spending so much time on the house!
Still to do:
- Kitchen Countertops
- Kitchen Backsplash
- Clean Kitchen window
- Final coat of paint on kitchen cabinet doors/drawers
- Rehang kitchen cabinet doors/drawers
- Final coat of paint on doors
- Rehang doors
- Install new light sheeting in kitchen
- Clean all the window tracks (prior to 10/10 hopefully!)
- Carpet whole house (scheduled for 10/10)
- Install trim in Master Bedroom (floor, closet jamb, sliding door jamb)
- Install wall base trim in Living Room
- Install floor trim piece at garage door & patio door in family room to cover flooring gap
- Clean both showers/tub
- Prune tree back away from roof
- Moss treat the roof
- Gravel the driveway side
- Clean up yards
- Remove all our stuff from the garage
- Scrub bathrooms one last time
- Vacate the house!

The house is really going to look great.